Prefabs: Implementation details
During my time at Limbic Entertainment I mostly worked on a project that was using the Unity game engine. In my eyes, Unity is a great piece of game authoring software, but nobody’s perfect; there still were some missing or somewhat unpolished features. Take the Prefab system: Its great to have something like this and it works flawlessly in most cases. Want to use a specific enemy type over and over again? Just make it a Prefab and re-using it boils down to a single dragdrop operation. When changing the Prefab later on, all instances are affected properly. But here’s the “not great” part:

You can’t nest Prefabs.
Assume you’re working on some hack’n’slay-ish game, basically a top down view and more or less generic dungeons. Each dungeon level is assembled from a number of different modules i.e. rooms. Each room consists of a set of grid-aligned tiles. So, you first create a Prefab for each unique tile without problems – in the next step, you will take these tile Prefabs to build rooms and create room Prefabs. Straightforward in theory, but impossible using Unity’s Prefab system:
As soon as you create a room Prefab from the room you built out of your tile instances, the tiles will no longer be instances of their tile Prefabs, because that would require nested Prefabs.
After experiencing what is and isn’t possible if you can’t nest Prefabs, the “Nested Prefabs” feature slowly advanced towards the top of my todo list for Duality. But how are Prefabs implemented anyway? What is a Prefab instance, speaking in terms of GameObject management and Scene serialization? I have no clue how the guys at Unity Technologies do it and wasn’t able to find any information about that on the internet, so I just figured something out myself.
When saving a Scene, I’m basically running a slightly customized BinaryFormatter over the scene graph. Most of the serialization process is completely automated. Related to serialization but mostly implemented manually is the ability to clone objects or to copy all data from one object to another at once. Cloning is nothing than instantiating a new Object and then invoking the CopyTo method.
A GameObjects connection to a Prefab resource is called PrefabLink and implemented as individual class. If no PrefabLink is referenced by a GameObject, then it simply isn’t linked to a Prefab and handled “as is”. PrefabLinks are designed to be passive and spend most of their existence on the development- and editor-side of Duality. Let’s build a car to illustrate Duality’s Prefab system.
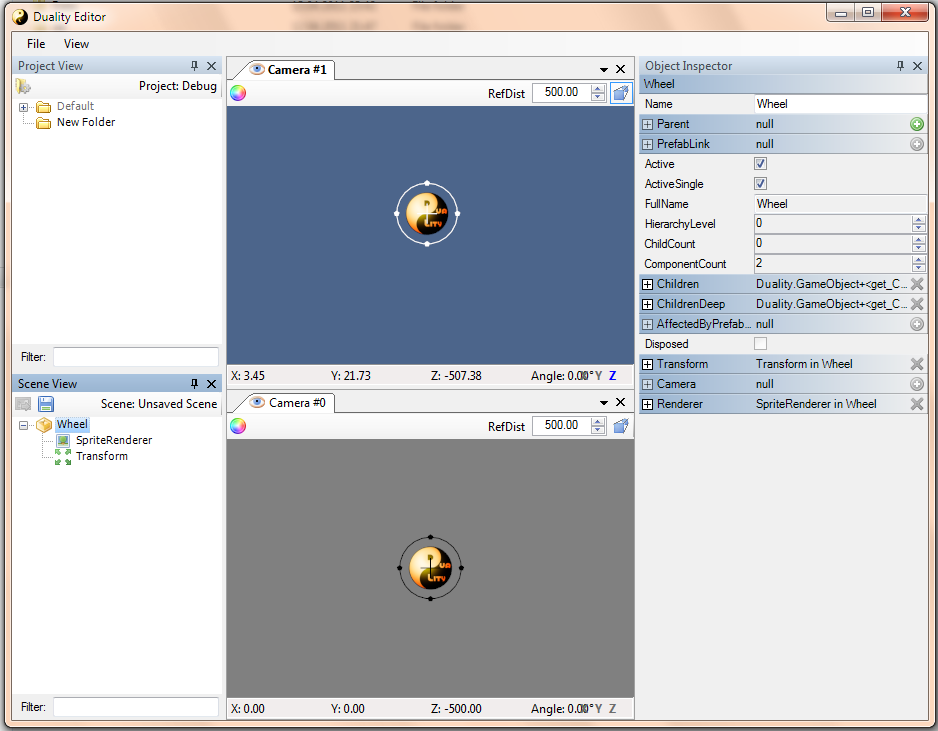
We begin with constructing a wheel by creating a GameObject, adding some Components and configuring them all. This is done by a few clicks inside the new Scene View area. It is important to keep in mind that our current wheel is going to be a Prefab: We should keep it at the origin [0, 0, 0] because its coordinates might be interpreted as offset when instantiating the it later on.
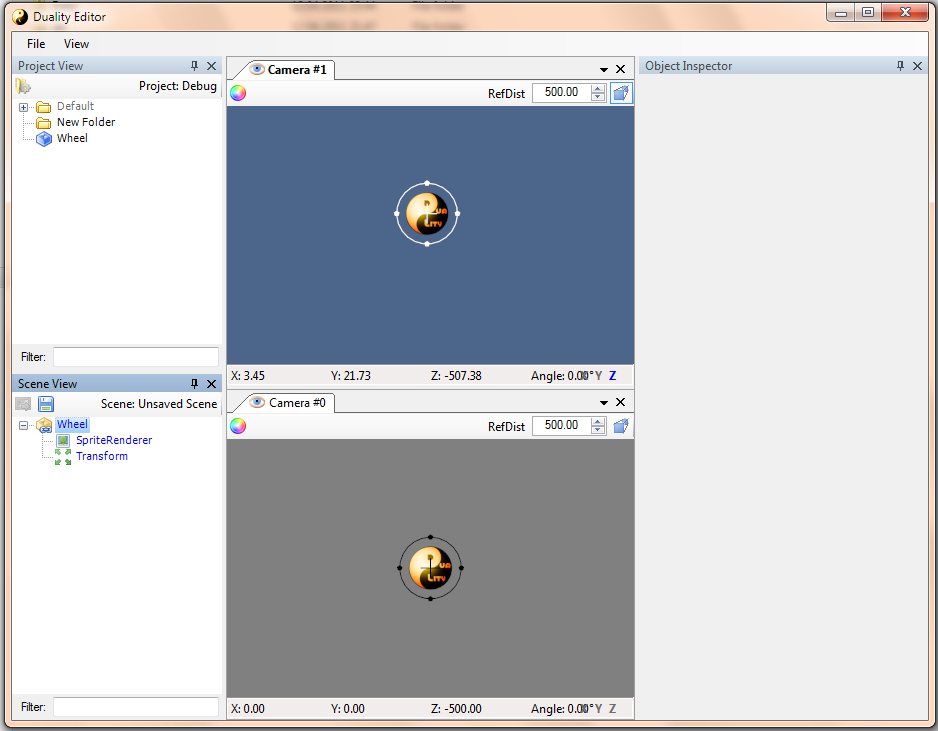
Next, we create a new Prefab Resource in the Project View area and drag our wheel GameObject onto the newly created Resource file. The Prefab is then filled with a slightly adjusted clone of the the wheel object; and the original wheel is linked to the Prefab. It is now an instance of the Prefab.
Whenever changing the Prefab, the PrefabLink object will re-instantiate its object based on the updated Prefab i.e. invoke the previously mentioned CopyTo method again. Unfortunately, this would normally overwrite each and every property of the instance: Imagine creating a lot of wheel instances, spreading them in the Scene and then triggering the PrefabLink re-instantiation: They would all jump back to their original position and be clones identical to their Prefab. That’s not very useful.
The trick is to keep track of which values have been modified after the PrefabLink has been established. Each PrefabLink holds a list of Properties that have been modified since – including their value. When re-instantiation is triggered and CopyTo has been called, the PrefabLink takes a look at its change list and adjusts all the marked Properties.
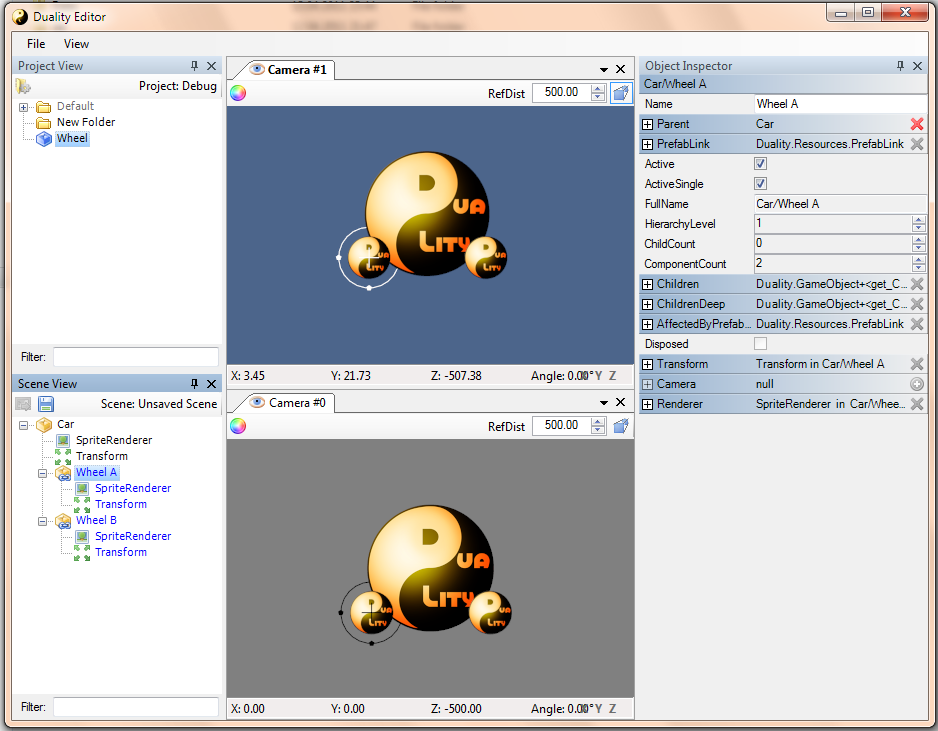
The next step in building our car object is to create the car GameObject itsself and then two Prefab instances for its two wheels. Instantiating a Prefab is simply done by a dragdrop operation from the Prefab to the target. We rename each wheel instance and move it to the desired position. Adding the corresponding Properties to the PrefabLinks change list is done fully automatic. We just edit stuff – all the rest happens behind the curtain using the already existing global PropertyChanged event.

This is how far we would’ve been come using a “flat” Prefab system. This next step requires nested Prefab support: Create a new Prefab and drag the car GameObject onto it to make it a car Prefab. In a flat approach, this would break its wheels connections to the wheel Prefab.
It’s possible to change the wheel Prefab any time, each of its instances, nested or not, properly updates. Prefab nesting is fully supported in any number of hierarchy levels.
The tricky part is how it works internally. When abstracting the car, its current version is statically copied into the Prefab. When (re-)instantiating it, the data is copied back into the car instance. This includes its wheels PrefabLinks which are recursively resolved after the cars PrefabLink has been resolved. Now what if we want to move around “Wheel A” after “Car” has established its PrefabLink?
If there was no car, the wheel would note its changed coordinates in its PrefabLink, saving them from being overwritten by re-instantiation. However, if the wheel is parented to a car which has its own PrefabLink, the wheels PrefabLink will be overwritten as soon as the car is re-instantiated. The cars child prefab instances become basically immune to any further changes. We can change the wheel Prefab without problems, but moving “Wheel A” slightly to the left inside “Car” will be ignored because our change list entry gets lost.
The solution to this problem is to propagate any change list entry to the highest available PrefabLink. When changing “Wheel A”, the change will be noted in “Wheel A”’s PrefabLink – which will then itsself be added to the PrefabLink of the “Car” parent object. When resolving all PrefabLinks, “Car” is done first. CopyTo resets the cars state and the state of all of its children to the Prefab version. Next, the change list is processed which adjusts the cars properties and its wheels PrefabLink objects – which will then do another resolve step on their own.
Nested Prefabs done that way can be pretty confusing though, so it’s not great without tradeoffs - maybe that’s why Unity doesn’t have them.