Hats and Terrain Rendering
I’m still figuring out how many hats a single guy can wear at once. So far, my personal hat count is something around “four”, counting two jobs, studying and personal life. As it turns out, I appear to have reached a limit for now. When this semesters courses began in October, the free amount of time at my disposal once again vanished, and so did the unsteady stream of content for this blog. This is just a faint sign of life, but hey – at least I’ve got some pictures.
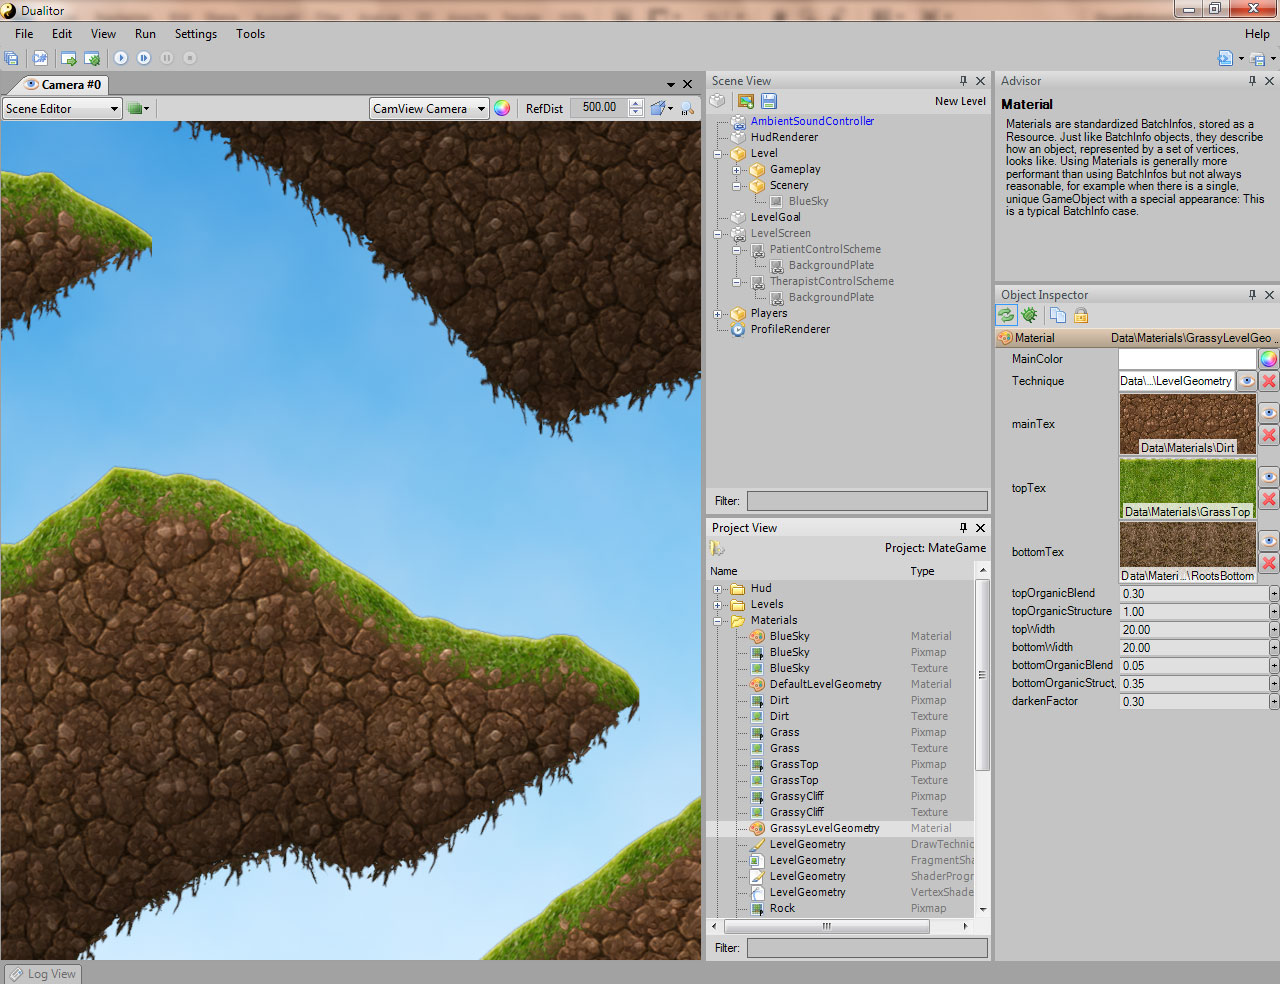
The first one is a screenshot from job #2, where I’m developing a game that will be used in a medical context. It’s called MATE and aims at motivating young patients in doing their physical exercise using a training device – which is basically used as a custom game controller. It has one degree of freedom and the target audience is not what you’d call a “gamer”, so I’m keeping the game itself small and simple: You’re maneuvering a paper plane through a dynamically generated landscape, collect gold coins and try not to hit anything. There also is a highscore at the end of each level and a set of ghost players from previous records.
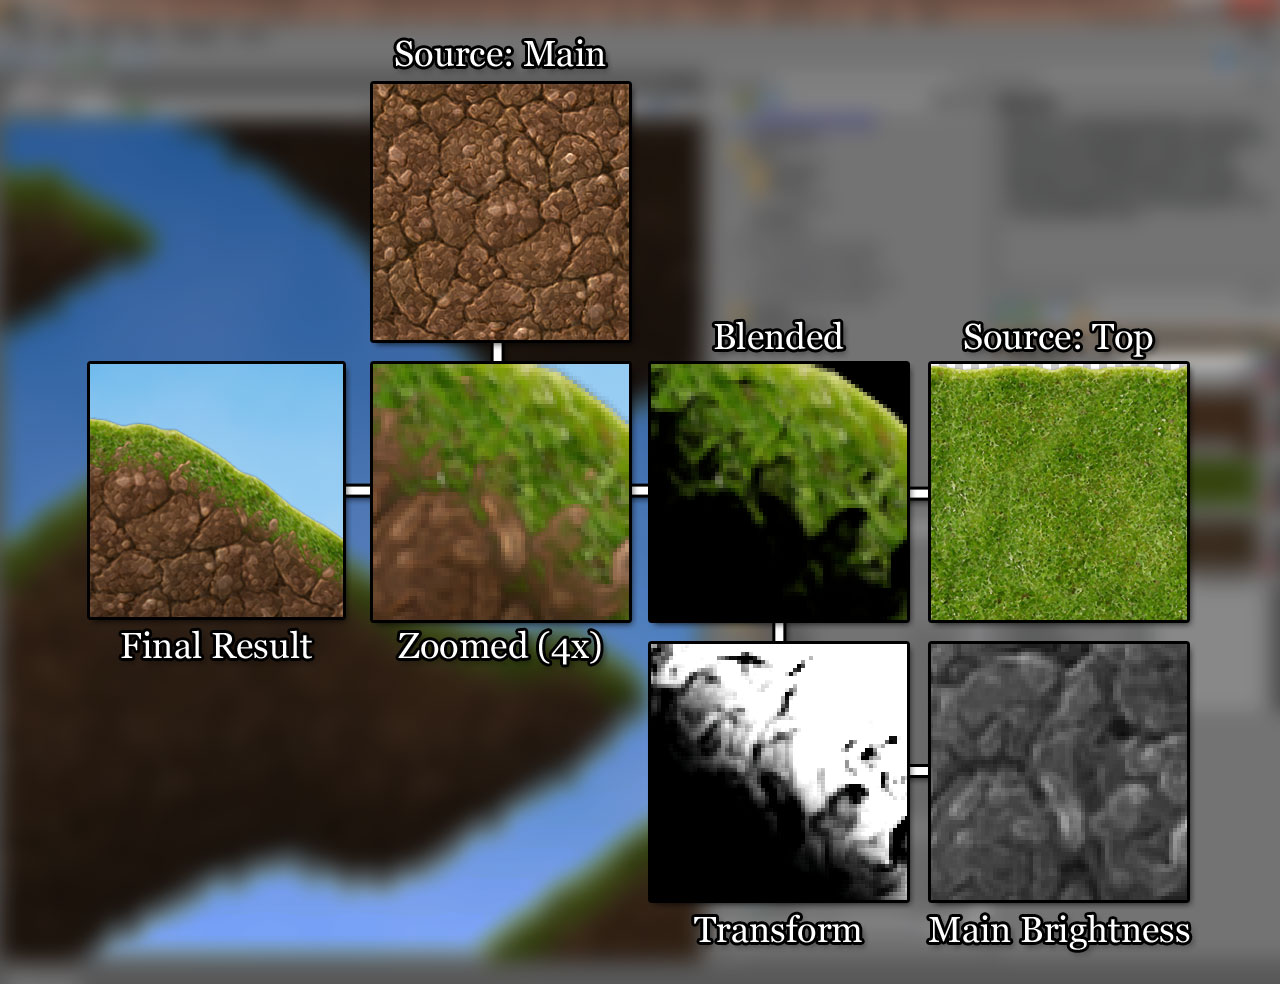
Level creation is done completely procedural and involves generating a (performance-) optimized polygonal representation of level geometry, which is then displayed in a way that may look similar to Worms terrain – except that it’s not destructible. Each chunk of landscape can be visually divided in three distinct parts: Top, Bottom and Body. Instead of rendering three distinct strips of triangles that overlay each other, I’ve chosen a different approach in order to gain a little more artistic freedom: In this case, a monolithic shader does all the rendering, including adaptive texture blending, outlining and some “hardcoded polishing”.

To achieve this, a new vertex format has been defined that carries four-dimensional texture coordinates (one U and three V values for each part) and two additional attributes defining both vertical “terrain chunk height” and its current vertical distance to the center line. In the first step, top and bottom outlines are determined using signed distance and total height. Since said distance is negative at the top, positive at the bottom and interpolates linearly across the polygon, each pixel is easily able to determine its local vertical position. This knowledge can then be used to calculate texture blending values, outlines and cheap lighting.
The resulting terrain effect is easily adjustable through uniform variables and looks quite good, provided that suitable source textures are available. Which is admittedly the hardest part for a programmer.